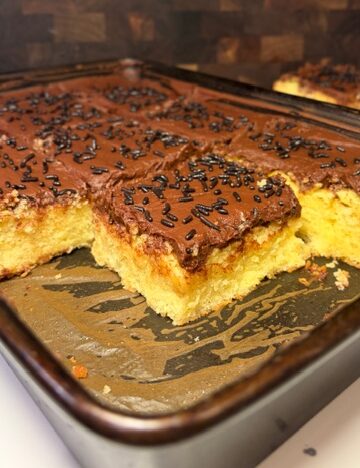
Yellow Sheet Cake with Chocolate Frosting
Picture this: a warm, sunny afternoon, the kind where the air is filled with the sweet melody of birds and the gentle rustling of leaves. This yellow sheet cake with chocolate frosting feels exactly like that — simple, comforting, and full of joy. It’s the kind of cake that doesn’t try too hard, yet somehow steals the entire show.
There’s something undeniably nostalgic about a classic yellow cake topped with rich chocolate frosting. It’s the birthday cake from childhood. The after-school snack. The cake your mom or grandmother made “just because.” And honestly? It never goes out of style.
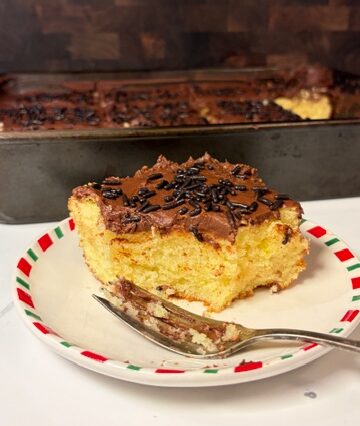
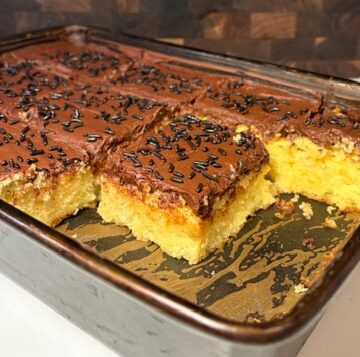
What I love most about this recipe is how effortless it is. Everything comes together in one pan. No stacking. No layering. No complicated decorating. Just a soft, buttery, perfectly moist cake with a thick swoop of velvety chocolate frosting and a shower of chocolate sprinkles on top.
The crumb is tender thanks to the combination of butter and oil. The flavor is rich and warm from real vanilla extract and extra egg yolks. And that frosting? Deep chocolate flavor, perfectly balanced sweetness, and just a touch of honey to give it a silky finish that makes you want to swipe an extra spoonful.
It’s the kind of cake that turns an ordinary Monday into something worth celebrating.
This yellow sheet cake with chocolate frosting is proof that simple recipes are often the most unforgettable. It’s cozy. It’s classic. And it’s the kind of cake that disappears faster than you expect.
Slice it up, pass it around, and watch how quickly it becomes a favorite.
Why This Yellow Sheet Cake Is the Best
- Ultra Moist Texture: The combination of butter and oil gives you the best of both worlds — flavor and moisture.
- Extra Richness: Four eggs plus two yolks create a soft, tender crumb with a beautiful golden color.
- Easy & Fuss-Free: Baked in a single 9×13 pan. No layering, no stress.
- Dreamy Chocolate Frosting: Cocoa-forward, fluffy, and perfectly spreadable.
- Pantry-Friendly Ingredients: You likely have everything you need already.
Why We Use These Ingredients
Butter + Oil: Butter adds flavor, while oil keeps the cake incredibly moist for days.
Extra Egg Yolks: Yolks add richness and give the cake that classic yellow color and tender texture.
Buttermilk: Adds moisture and a slight tang that balances the sweetness while keeping the crumb soft.
Honey in the Frosting: Just a tablespoon makes the frosting extra smooth and adds a subtle depth of flavor.
Cocoa Powder: Natural cocoa gives the frosting that classic chocolate flavor we all expect.
When to Make This Cake
- Birthday parties
- Potlucks
- Summer BBQs
- Snow days
- “Just because” baking days
It truly fits every occasion.
Ingredients
For the cake:
- 1/2 cup (113 grams) unsalted butter, room temperature
- 1/2 cup vegetable oil (120 grams)
- 1 1/2 cups granulated sugar (300 grams)
- 4 large eggs, room temperature
- 2 large egg yolks, room temperature
- 1 tablespoon vanilla extract (12 grams)
- 2 2/3 cups all-purpose flour (333 grams)
- 2 1/4 teaspoons baking powder (9 grams)
- 1 teaspoon salt (6 grams)
- 1 1/3 cups buttermilk, room temperature (320 grams)
For the Chocolate Frosting:
- 1 cup (226 grams) unsalted butter, room temperature
- 2/3 cup natural cocoa powder (67 grams)
- 3 cups powdered sugar (360 grams)
- 2 tablespoons milk (30 grams)
- 2 tablespoons heavy cream (30 grams)
- 1 tablespoon honey (21 grams)
- 1 teaspoon vanilla extract (4 grams)
- 1/4 teaspoon salt (1.5 grams)
- 1/4 cup chocolate sprinkles (45 grams)
Directions
Step 1: Make the Cake
- Preheat your oven to 350°F (175°C). Line a 9×13-inch rectangular baking pan with parchment paper on all sides.
- In a stand mixer fitted with the whisk attachment, add the butter and vegetable oil. Beat on low speed until combined (so the oil doesn’t splash), then gradually increase to medium-high and beat until smooth, about 2 minutes.
- Add the eggs, extra egg yolks, and vanilla extract. Beat on medium speed until the mixture becomes light and fluffy, about 2 minutes. Scrape down the sides and bottom of the bowl with a silicone spatula as needed.
- In a separate bowl, whisk together the flour, baking powder, and salt.
- With the mixer on low speed, alternate adding the dry ingredients and the buttermilk in three additions:
- Add half of the dry ingredients
- Add all of the buttermilk
- Finish with the remaining dry ingredients
- Transfer the batter into your prepared pan and use a silicone spatula to spread it into an even layer.
- Bake for 35–40 minutes, until the cake has risen, the top springs back lightly when touched, and a butter knife inserted into the center comes out mostly clean.
- Place the pan on a cooling rack and allow the cake to cool completely, about 30 minutes.
Step 2: Make the Frosting
- In a stand mixer fitted with the paddle attachment, combine the butter and cocoa powder. Beat on low speed until fully incorporated, about 30 seconds.
- Add the powdered sugar, milk, heavy cream, honey, vanilla extract, and salt.
- Beat on medium speed, scraping down the sides and bottom of the bowl as needed, until the frosting is fluffy and slightly lighter in color, about 30 seconds to 1 minute.
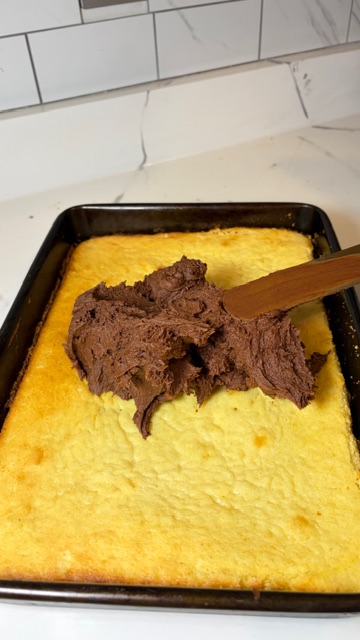
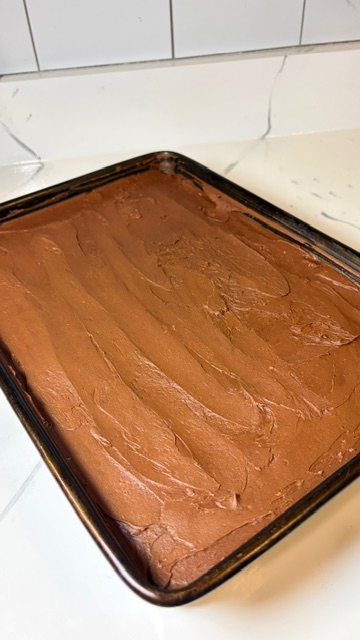
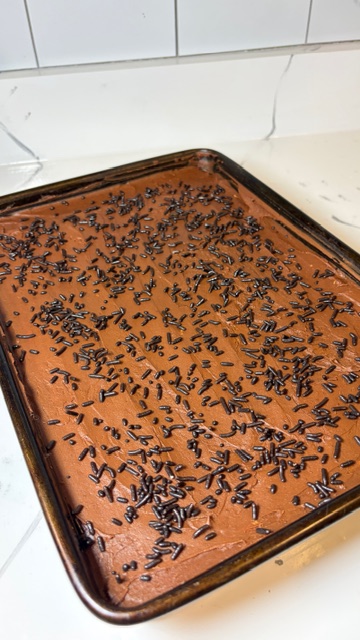
- Spread the frosting over the completely cooled cake. Use the back of a large spoon to create swoops and swirls.
- Top with chocolate sprinkles.
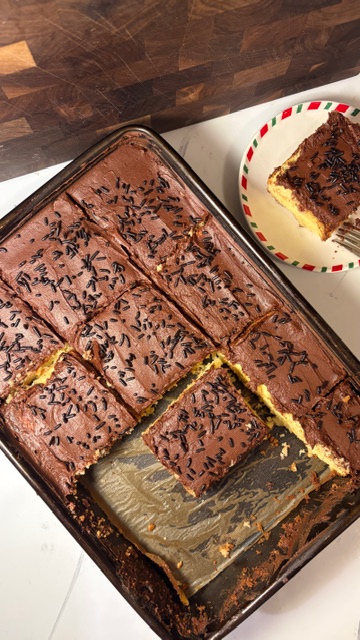
- Cut into squares and enjoy.
Bake Ahead & Storage
Bake Ahead:
You can bake the cake 1 day in advance. Let it cool completely, then cover tightly with plastic wrap and store at room temperature. Frost the day you plan to serve for the freshest texture.
The frosting can also be made 1 day ahead and stored in an airtight container in the refrigerator. Bring to room temperature and re-whip before spreading.
Storage:
- Store the frosted cake covered at room temperature for up to 3 days.
- For longer storage, refrigerate for up to 5 days. Allow slices to come to room temperature before serving for the best texture.
- You can also freeze the unfrosted cake for up to 2 months. Wrap tightly in plastic wrap and foil. Thaw overnight in the refrigerator before frosting.