
Red Velvet Scones
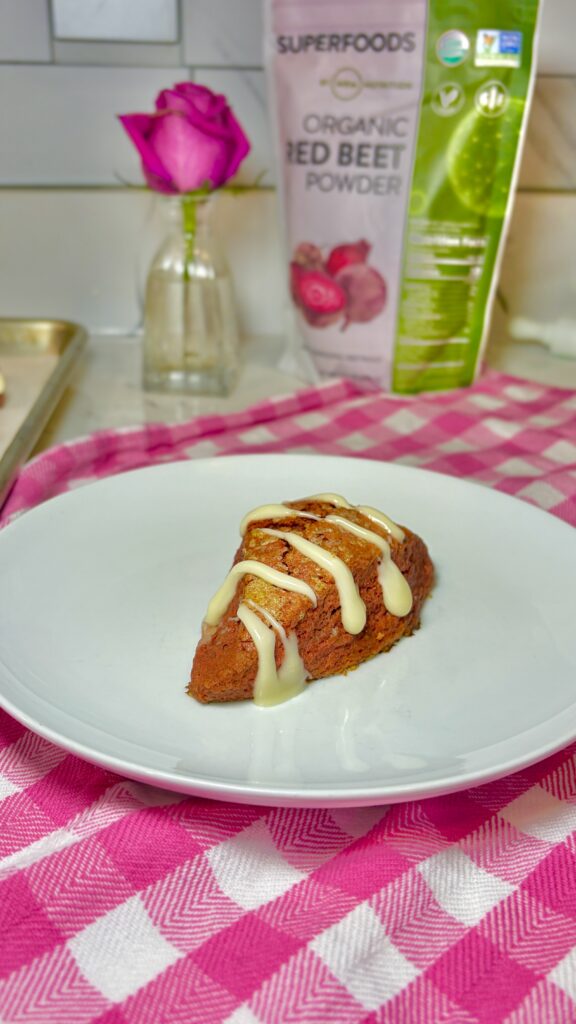
These Red Velvet Scones are buttery, tender, lightly chocolatey, and made with MRM Nutrition Organic Red Beet Powder for their beautiful natural red color. Instead of relying on traditional red food coloring, the beet powder gives the scones their gorgeous hue while cocoa powder brings in that classic red velvet flavor.
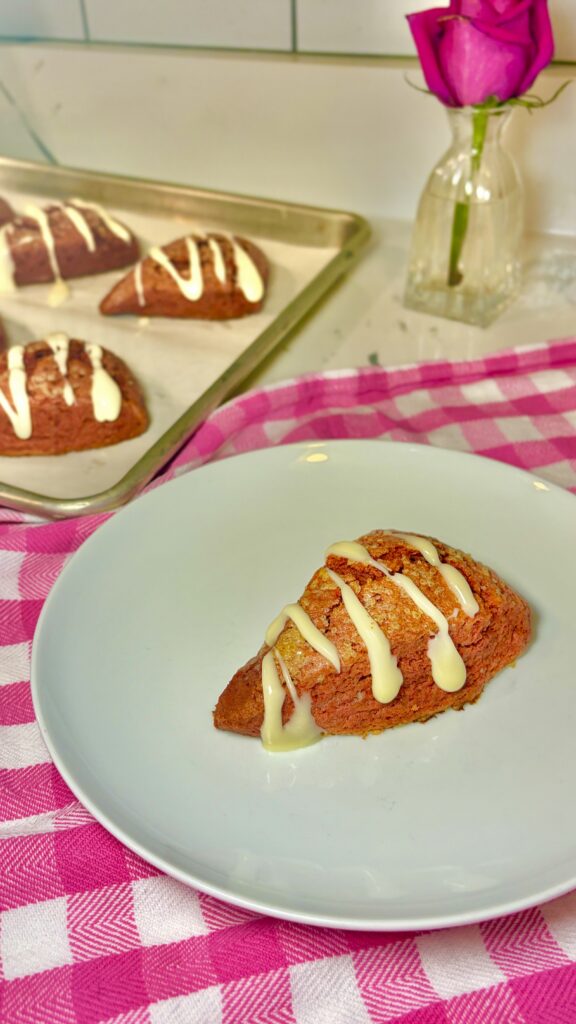
They’re finished with a simple vanilla glaze that adds just enough sweetness without overpowering the scone itself. These are perfect with coffee or tea, for weekend brunch, or anytime you want something that feels a little more special than your everyday scone.
Why You’ll Love These Red Velvet Scones
- Naturally colored – MRM Organic Red Beet Powder gives these scones their red color without traditional artificial red food dye.
- Tender and buttery – Cold butter and heavy cream create those soft, flaky layers you want in a bakery-style scone.
- Light chocolate flavor – Just enough cocoa powder gives them that classic red velvet flavor without turning them into chocolate scones.
- Not overly sweet – The scones themselves are lightly sweetened, while the vanilla glaze adds the perfect finishing touch.
- Small-batch recipe – This recipe makes six generous scones, perfect for a weekend bake.


Ingredient Notes
MRM Nutrition Organic Red Beet Powder
The star ingredient in these scones! MRM Organic Red Beet Powder adds a naturally deep reddish color to the dough and pairs beautifully with cocoa powder for that signature red velvet look.
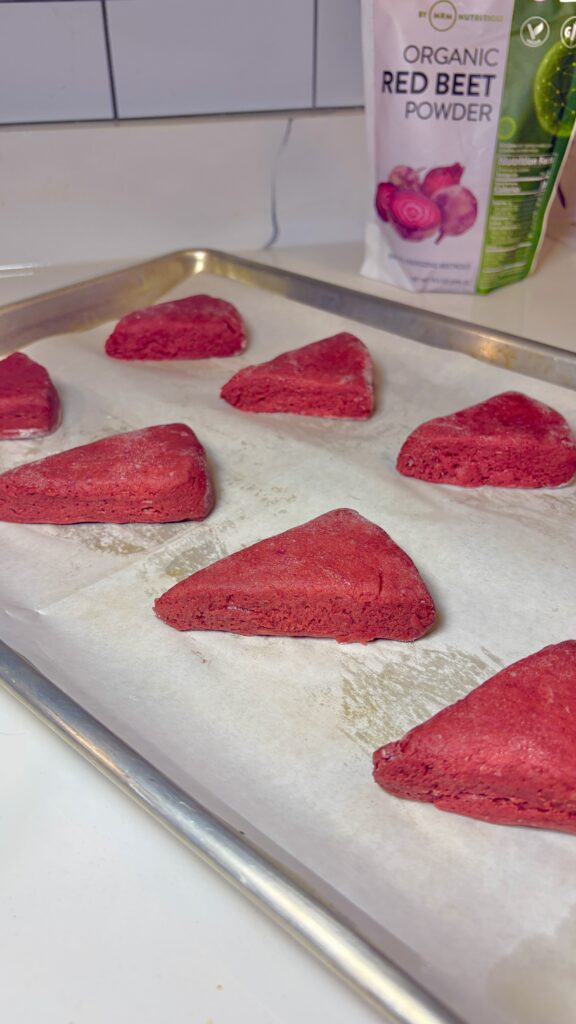
Because beet powder is concentrated, you only need 1 ½ tablespoons. Keep in mind that naturally colored baked goods can vary slightly in color after baking, so the finished scones may be a little deeper or softer in color than the raw dough.
Cocoa Powder
Two tablespoons of cocoa powder provide the subtle chocolate flavor that makes red velvet, well…red velvet. We aren’t trying to make a full chocolate scone here, so a small amount is all you need.
Cold Butter
Cold butter is one of the most important parts of making tender, flaky scones. Keep it refrigerated until you’re ready to use it, then cut it into the flour mixture until you have small pieces of butter throughout.
Those little butter pieces release steam as they bake, helping create layers and giving the scones their bakery-style texture.
Heavy Cream
Heavy cream adds richness and moisture without making the dough overly wet. Make sure it’s cold when you add it to the dough.
Coarse Sugar
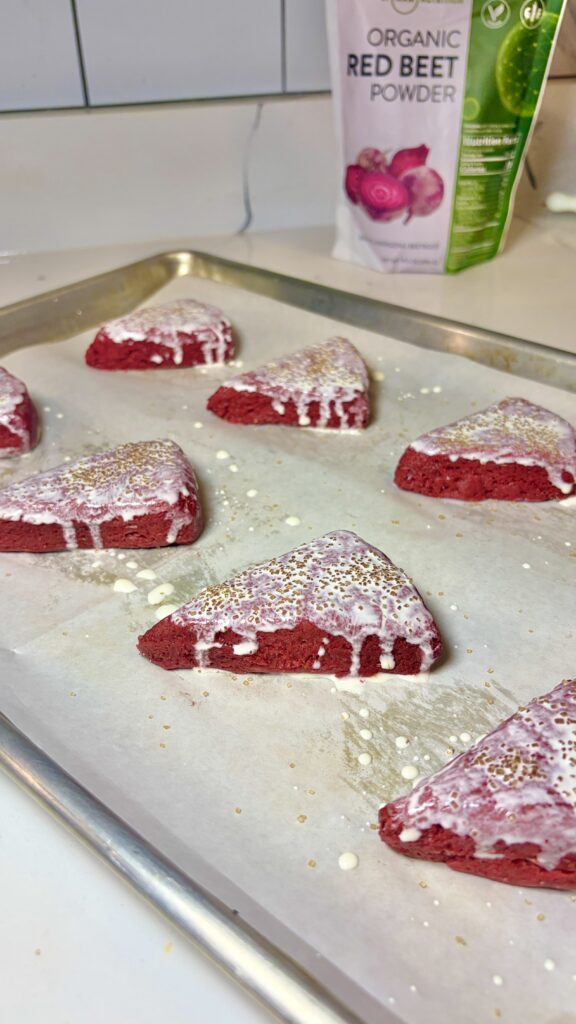
A little coarse sugar sprinkled over the tops before baking gives the scones a lightly crisp, sparkly finish.
Tips for the Best Scones
Keep everything cold. Cold butter, cold cream, and even a cold egg help prevent the butter from melting before the scones reach the oven.
Don’t overwork the dough. Mix just until everything comes together. Overmixing develops more gluten and can make your scones tough instead of tender.
Leave visible butter pieces. When cutting the butter into the dry ingredients, you want some pea-sized pieces remaining. You don’t want the mixture completely smooth.
Chill before baking if the dough feels warm. After shaping and cutting the scones, place them in the refrigerator for about 15–20 minutes if your kitchen is warm or the butter has started softening.
Don’t add too much liquid to the glaze. Start with 1 teaspoon of heavy cream and slowly add more until the glaze reaches a thick but drizzleable consistency.
Frequently Asked Questions
Does beet powder make the scones taste like beets?
The beet powder is balanced by the cocoa, vanilla, sugar, butter, and cream, so it isn’t meant to give these scones a strong beet flavor. Its main purpose here is adding natural color.
Why aren’t my red velvet scones bright red?
Beet powder creates a more natural red tone than artificial food coloring, and the cocoa powder also deepens the color. Natural color can also change slightly during baking, so don’t expect the same vivid red you would get from conventional red food coloring.
Can I use regular food coloring instead?
This recipe was specifically developed around beet powder, so removing it can change both the color and the dry ingredient ratio. I recommend keeping the beet powder for the intended result.
Why does the butter need to be so cold?
Cold butter stays in small pieces throughout the dough. Once those pieces hit the hot oven, the water in the butter turns into steam, helping create tender layers throughout the scones.
Can I make these ahead of time?
Yes! You can shape and cut the scones, place them on a parchment-lined baking sheet, cover them, and refrigerate them overnight. Bake them the following day while they’re still cold.

Storage & Freezing
Store leftover Red Velvet Scones in an airtight container at room temperature for up to 2 days. For slightly longer storage, keep them refrigerated for up to 4 days and allow them to come to room temperature before serving.
To freeze baked scones, let them cool completely and freeze them in an airtight container or freezer-safe bag for up to 2 months. For the best appearance, I recommend freezing them before adding the glaze and glazing them after thawing.
You can also freeze the unbaked scones. Shape and cut the dough, freeze the individual wedges until solid, then transfer them to a freezer-safe container. Bake directly from frozen, adding a few extra minutes to the baking time as needed.
Tools I Use for This Recipe
This post may contain affiliate links. If you purchase through one of my links, I may earn a small commission at no additional cost to you. Thank you for supporting Bonia Bakery!
Here are a few of my favorite tools for making homemade scones:
- Digital kitchen scale – Measuring flour by weight is the easiest way to get consistently soft, tender scones.
- Mixing bowls – You’ll need a large bowl for the dry ingredients and a smaller bowl for whisking together the wet ingredients.
- Pastry cutter – Makes it easy to cut the cold butter into the flour without warming it too much with your hands.
- Rolling pin – Helpful for gently shaping the dough into an even round before cutting.
- Parchment paper – Keeps the scones from sticking and makes cleanup much easier.

Red Velvet Scones
Yield: 6 scones
Ingredients
For the Scones
- 1 ¾ cups (210 g) all-purpose flour
- 2 tablespoons cocoa powder
- 1 ½ tablespoons MRM Nutrition Organic Red Beet Powder
- ¼ cup (50 g) granulated sugar
- 1 ½ teaspoons baking powder
- ⅜ teaspoon salt
- 6 tablespoons (85 g) very cold unsalted butter
- 1 large egg
- ½ cup + 1 tablespoon cold heavy cream
- ¾ teaspoon vanilla extract
- Coarse sugar, for topping
For the Vanilla Glaze
- 6 tablespoons powdered sugar
- ¼ teaspoon vanilla extract
- 1–2 teaspoons heavy cream
Instructions
Make the Scones
- Preheat the oven.
Preheat the oven to 400°F (204°C) and line a baking sheet with parchment paper. - Combine the dry ingredients.
In a large mixing bowl, whisk together the flour, cocoa powder, MRM Organic Red Beet Powder, granulated sugar, baking powder, and salt. - Cut in the butter.
Cut the very cold butter into small cubes. Add it to the dry ingredients and use a pastry cutter to work the butter into the flour mixture until you have a crumbly mixture with some pea-sized pieces of butter remaining. - Combine the wet ingredients.
In a separate small bowl, whisk together the egg, cold heavy cream, and vanilla extract. - Make the dough.
Pour the wet ingredients into the dry ingredients. Gently stir with a spatula or fork just until a shaggy dough begins to form. - Shape the dough.
Turn the dough onto a lightly floured surface and gently bring it together with your hands. Avoid kneading it excessively.
Shape or gently roll the dough into a round approximately 1 inch thick. - Cut the scones.
Using a sharp knife or bench scraper, cut the circle into 6 equal wedges. - Prepare for baking.
Arrange the scones on the prepared baking sheet, leaving a little space between each one. Lightly brush the tops with heavy cream and sprinkle with coarse sugar.
If the dough has become soft or warm, refrigerate the shaped scones for 15–20 minutes before baking. - Bake.
Bake for approximately 17–21 minutes, or until the scones are set around the edges and the bottoms are lightly golden. - Cool.
Let the scones cool on the baking sheet for about 5 minutes before transferring them to a cooling rack.
Make the Vanilla Glaze
- In a small bowl, whisk together the powdered sugar, vanilla extract, and 1 teaspoon heavy cream.
- Add additional heavy cream a little at a time until the glaze reaches your desired consistency.
- Once the scones have cooled, drizzle the vanilla glaze over the tops.
- Allow the glaze to set for a few minutes before serving.
Enjoy!